Lemon-strawberry Cheesecake Cupcakes

I found this recipe in the most recent edition of ‘Food & Drink’ magazine (available FREE from the LCBO 4x per year). I made it for Easter dessert… it’s light and very quick to make. My dessert-hating brother even enjoyed them and said they were just the right size for a nice finish to a very large meal.

Ingredients:

  • 75g lemon tea biscuits
  • 3 tbsp butter, melted
  • 2 blocks (16 oz) cream cheese, at room temperature
  • ½ cup extra-fruit strawberry jam
  • ¼ cup white sugar
  • 2 eggs, at room temperature
  • 1 tsp vanilla extract

Prep time: 20 mins

Bake time: 20 mins

Makes 12 standard cupcakes

Preheat oven to 375F

Line muffin tray with paper cups.

In a food processor, whirl the cookies until they are fine crumbs, should have about 1 cup. Add melted butter and pulse a few times to combine. Should have a coarse crumb now. Divide evenly in muffin cups. I used the bottom of a shot glass to press the crumbs in. You could use your fingers or the back of a teaspoon.

Wipe out the food processor and add the cream cheese, jam, sugar, eggs, and vanilla. Whirl until combined, showing no lumps of cream cheese. Divide batter evenly in the muffin cups. Tap the tray on the counter to get the batter to settle.

Bake for 20 minutes. The cakes should show a few cracks in the top.

Allow to cool completely. Cover and refrigerate for up to 2 days. Serve chilled.

Notes:

  1. I used Peak Freans lemon social cookies… or something like that. They look like little wafer cookies and this recipe used approximately ¼ of a box.
Posted in baking | Tagged , , , | Leave a comment

Pasta Salad with Tomatoes and Edamame

This recipe came to me from a friend who brought it to a potluck at my place. (Don’t you just love potlucks??) Everyone has eaten pasta salad in their life but this one is not your boring 1990 family picnic deal – this one has edamame (oooo culture). Note that MS Word does not recognize edamame. MS Word needs a shot of culture. This recipe is very easy to throw together and has a great fresh taste. It also gets better with time… so make it early and let all the flavours fester. Adapted from epicurious.

Ingredients:

  • ¼ cup white-wine-vinegar
  • 2 tbsp water
  • 2 tsp salt
  • ½ tsp white sugar
  • 2 tsp minced fresh tarragon or ½ tsp dried
  • 1 large clove garlic, minced
  • ½ cup olive oil
  • 1 lb your choice pasta (I like shells or bow-ties)
  • ½ lb edamame beans, steamed and drained1
  • 2 pints cherry or grape tomatoes, sliced in half
  • ½ cup fresh basil, cut into ribbons (I can’t spell chiffonade)

Prep time: 15 minutes + fridge settle time2

Total servings: 8 for a potluck, 4 as a dinner side

Whisk together vinegar, water, salt, tarragon, garlic, and some black pepper to taste. Add oil in a stream, whisking will pouring. Give it all a serious whisk and set aside.

IMG_3078

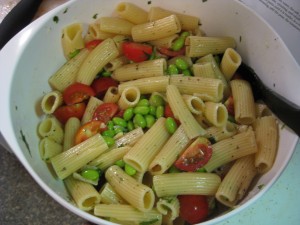
In the meantime, cook paste until tender and rinse well. Toss pasta, tomatoes, edamame, and basil in with the dressing. Serve cold.

IMG_3082

Notes:

  1. I must give credit to my friends Jay & Keo for choosing to put the edamame beans in. The original recipe calls from frozen peas. You could totally do this also but the edamame is awesome. You can find edamame in the freezer section at the grocery store. At my local store it’s not with the other vegetables but with the… vegetarian healthy stuff? I’m not sure… but it’s there! You cook them the same as frozen peas. I make it easy for myself and do it in the microwave.
  2. Really you could eat this right away but do yourself a favour and give it a few hours to settle.
Posted in salad, Sides | Tagged , , , | Leave a comment

Ginger-Peanut Chicken & Pasta Toss

I made this recipe last Friday for a friend and it took no time at all to put together. It’s really simple and a great meal for a weekday. This recipe comes to me from my lovely Aunt Donna who seems to have a great collection of recipes for easy and tasty meals.

Ingredients:

  • 3 tbsp soy sauce
  • 3 tbsp peanut butter
  • 2 tbsp minced ginger root
  • 1 tbsp brown sugar
  • 1 tbsp sesame oil
  • 1 tbsp rice vinegar
  • 2 cloves garlic, minced
  • Vegetable oil
  • 1 lb skinless, boneless chicken, cubed (breast or thigh)
  • 1 onion, small diced
  • 1 red bell pepper, thin sliced
  • A couple of good handfuls of spinach
  • 1 package egg noodles

Prep time: 30 minutes

Makes 2 large portions… if you’re serving more than 2 people, double it up.

Combine soy sauce, peanut butter, ginger, sugar, sesame oil, rice vinegar, and garlic in a small bowl. Set aside.

In a wok or large skillet, heat oil over high heat and add chicken and cook through. Remove chicken from pan, reserving any juices.

(now is a good time to put your pasta on to boil)

Add onion and peppers to pan and sauté for 3-5 minutes.

Reduce heat, return chicken and juices to pan along with peanut butter sauce. Toss to coat. Let simmer 2 minutes

IMG_4258

Add spinach and toss until the spinach is fully incorporated and soft. (The spinach will look like a lot but it warms down to just about nothing.)

IMG_4261

Serve over hot pasta!

Posted in dinner | Tagged , , , , | Leave a comment

Meatballs

These puppies are so tasty and versatile you would be silly not to try them. I have added them to marinara sauce and served with spaghetti, or to make into a meatball sub. You could also put them on a plate with toothpicks and serve as an appetizer. You can also bake them and then eat them off the pan. Not that I’ve ever done this. Ever.

Ingredients:

  • 2 lbs ground beef
  • 2 eggs, lightly beaten
  • ½ cup Italian salad dressing
  • ¼ cup grated Parmesan cheese (dry stuff or fresh grated works too)
  • 2 cloves garlic, chopped
  • 1 cup bread crumbs
  • Salt & pepper

Optional: ¼ cup finely chopped white onion

Makes about 80 1” meatballs (enough to share!)

Total prep time: 15 minutes

Total bake time: 22 minutes per tray X 4 trays

In a large bowl combine meat, eggs, dressing, cheese, and garlic. I like to mix it after each ingredient to ensure full integration. I use a fork or my hands. It’s super slimy but it’s the best way to get it all mixed up. Give it a try, live a little.

Add the bread crumbs last.

Spray a large cookie sheet or line with a silicon baking mat. The mat works marvelously.

Roll the meat mixture into 1” balls and place on the sheet. I got about 20-25 on each sheet. You can put them pretty close together as they don’t expand.

Bake at 350F for 22 minutes.

The rest is up to you!

A nice weekday meal that I like to put together… in a large skillet, add your fully cooked meatballs and equal parts ketchup and grape jelly (trust me!!). If I’m using all the meatballs it takes about a cup of ketchup and a cup of grape jelly. Allow to heat through and all the jelly lumps are gone. Serve over rice.

Posted in dinner, snacks | Leave a comment

Shepherd's Pie

In an effort to eat a bit healthier, I turned to my health-conscious friends Janet and Greta Podleski of “Eat Shrink and Be Merry”. These girls are all about taking everyday classics and making them a little friendlier on your waste-line. I recently started doing hot yoga and I wanted to adjust my diet along with my exercise. Tonight I tried out their take on Shepherd’s Pie.

Ingredients:

Filling

  • 1 ½ lbs extra-lean ground beef
  • 1 cup chopped yellow onion
  • 2 tsp chopped garlic
  • 1 tsp paprika
  • ½ tsp thyme
  • 1 cup frozen peas and carrots combo
  • 1 cup frozen or canned corn
  • 2/3 cup beef broth
  • 1 ½ tbsp chili sauce (I used Tabasco)
  • 1 ½ tbsp flour
  • 1 tbsp Worcestershire sauce1
  • ¼ tsp salt and pepper

Topping

  • 2 lb yellow potatoes
  • 2 cups chopped butternut squash
  • ¼ – ½ cup sour cream
  • ½ cup parmesan cheese
  • ¼ tsp salt
  • Dash nutmeg

Total Serving: 6

Total prep time: 40 mins + 25 mins bake time

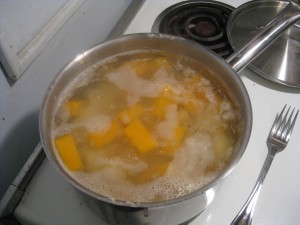
To prepare the topping, chop the potatoes and squash into similar sized chunks. Toss ONLY the potatoes in a pot of water and turn to boil. Once water has begun boiling, add squash pieces2. Boil under tender and drain.

Mmmmm boiling potatoes and squash…

IMG_3884

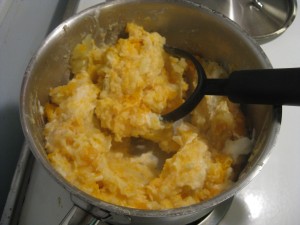
Return vegetables to pot and dump into almost all of the parmesan. Put the lid on to allow cheese to melt, about a minute. Add the sour cream3, salt, and nutmeg. Mash the crap out of it and get rid of lumps. Put the lid on the pot and set aside.

IMG_3885

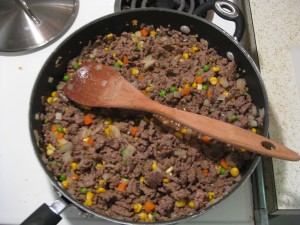
To prepare the filling, add the meat, onion, and garlic to a large frying pan on medium high heat. Cook until meat is no longer pink and onions are soft. Add paprika, thyme, peas, carrots, and corn. Mix well and allow to continue to simmering at medium heat.

In a bowl, combine broth, chili sauce, flour, and Worcestershire. Add this to the pan with the meat along with the salt and pepper. Turn heat to medium-low and allow to simmer 5 more minutes. Sauce will thicken.

IMG_3888

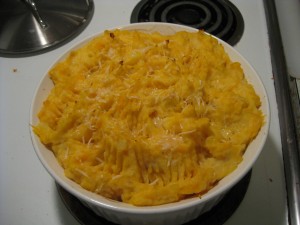
Once filling is thickened up, pour it all into a large 8 cup casserole dish4.Top with the potato mixture and the remaining parmesan cheese. Fluff the potatoes with a fork. Bake for 25 minutes or until sides are bubbling at 375F. Allow to rest 5 minutes before serving.

There she is!

IMG_3889

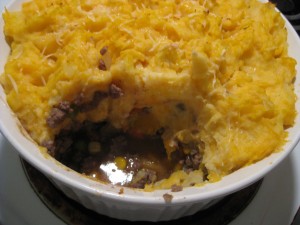
Look at that fluffy topping! It’s so light and tasty with the squash.

IMG_3891

Notes:

  1. Wor-chest-ter-shire…. Wor-sest-ter-sheer…. Wor-chester-shireee…. Ok, here’s a secret… it’s pronounced Wusst-i-sheer. ‘Wusst’ like ‘What a wuss’ but with a ‘t’. The ‘i’ makes the same sound as the ‘i’ in ‘Erica’. WUSST-i-sheer. Now you know.
  2. The squash cooks faster than the potatoes and will get slimy if they cook too long.
  3. In the original recipe it says ½ cup sour cream but this was too much for my potatoes. I recommend adding it by the tablespoon and stopping once your potatoes are smooth. Alternatively you can use milk, butter, cream, etc. Any will work, all a matter of preference.
  4. I used one of those large round Corel casserole dishes but you could easily put it in a lasagna pan or whatever you’ve got. Make sure it’s not over full as it will bubble up the sides and spill out into your oven if the dish is too small.
Posted in dinner | Tagged , , , | 2 Comments

Red Velvet Cupcakes

To get it out of the way I’ll put the recipe at the top and then leave my (witty?) banter for after. This gem comes to us from “Martha Stewart Cupcakes” which is a delightful little book and I recommend everything from it so far.

Ingredients:

  • 2 ½ cups cake/pastry flour (not self-rising) sifted
  • 2 tablespoons cocoa powder
  • 1 teaspoon salt
  • 1 ½ cups white sugar
  • 1 ½ cups vegetable oil
  • 2 large eggs
  • ½ teaspoon red gel food colouring1 OR 1 bottle liquid colouring
  • 1 teaspoon vanilla extract
  • 1 cup buttermilk2
  • 1 ½ teaspoon baking soda
  • 2 teaspoon distilled white vinegar

Makes 24 standard cupcakes.

Preheat oven to 350F, line muffin tin with liners

Whisk together flour, salt, and cocoa powder, set aside.

With an electric mixer on medium, combine sugar and oil. Add eggs one at a time. Mix in food colouring and vanilla.

Reduce speed to low and alternate adding flour mixture and buttermilk, starting and finishing with flour. Stir well after each addition. In a small bowl, combine baking soda and vinegar (foamy! science!) Add this to the batter, mix on medium for 10 seconds.

Fill muffin cups ¾ full. Bake for 20 minutes, rotating halfway. If you put 2 trays in at once it may take a few minutes longer. With one tray at a time I was right done at 20 minutes.

Cupcakes can be stored at room temp overnight in a container, in the fridge for 3 days, or 2 months in the freezer.
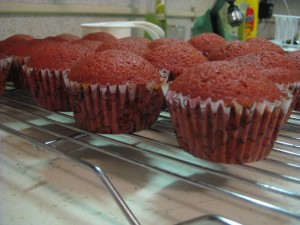
IMG_3864

Notes:

  1. I recommend gel food colouring. It’s available at Michael’s with the cake decorating supplies. You get a much more vivid colour and it also doesn’t change the consistency of your batter. I bought a box of 8 colours and it lasts a very long time, you only need a little.
  2. You can make a buttermilk substitution by combining 1 tablespoon of lemon juice or white vinegar with enough regular milk to make 1 cup, let it sit 5-10 minutes and you’re good to go.

I used cream cheese frosting and this INSANE chocolate frosting from this Anna Olsen recipe. If you’re not into piping or decorating or you’re just not feeling like standing in the kitchen for 4 hours, stick with the cream cheese frosting. If you like A LOT of icing, double this recipe. If you’re alright with a modest amount stick with this.

Ingredients:

  • ½ cup butter, room temperature
  • 6 oz cream cheese, room temperature (3/4 of a philly box)
  • 2 cups icing sugar
  • ¼ teaspoon vanilla extract

With mixer on medium speed, or a well-toned wrist, combine butter and cream cheese until smooth. Slowly add sugar and then finally vanilla. If you’re not using it right away it will stay in the fridge for 3 days, just bring it to room temperature before using

Ice your cupcakes and Enjoy! I’m already scheming dying the frosting green for Christmas. Really, how cute would that be… red cupcakes with green frosting? It’ll happen.

Here’s what mine looked like!

IMG_3867_edit

Now here is my banter… I insist on banter because I was in my kitchen for FOUR hours last night. Let me have my banter.

After taking the dog for a long walk after work yesterday I found myself with an entirely free evening. As this occurrence is pretty rare I decided to do something that I knew would a) be worth it, and b) take the whole evening. I made cupcakes and then decorated them for Halloween. I dusted off my Martha Stewart Cupcakes cookbook…. Ok that’s a lie, that book sits next to me on my desk. Anyway, I OPENED my Martha cupcake book and based on a recommendation from the lovely Ms. Rosen I found the recipe for Red Velvet Cupcakes. Feeling a little festive I felt that a dark red cupcake was appropriate. Velvet is a great word to describe these cupcakes as they are very moist and almost delicate tasting and smooth yet they still rise to form nice domes for frosting. Pretty much you are heading for a win-win. It quickly turned into a win-win-win when cream cheese frosting came into the picture.

Sidebar: WHY is it that nearly every icing recipe which accompanies a separate recipe, whether it be a cake, loaf, cupcake, etc, results in nearly twice as much as you need? In the partnering picture it doesn’t LOOK like there is that much more icing than you have put on. Pretty much I have started halving all icing recipes. I have yet to lose. Well, technically I lost this weekend when I made a German chocolate cake and had this killer chocolate icing leftover… but I was a smartie and it went into the freezer and was ready for me to use last night.

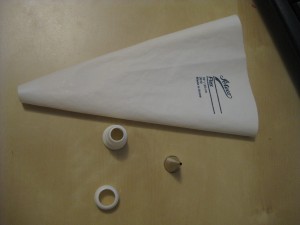
Back to cupcakes… I whipped up the Red Velvet Awesome-cakes and then went to work. With Halloween on the brain I chose to ice half of the cupcakes with cream cheese frosting and the other half with chocolate. I got out my handy piping set and began drawing bats and ghosts on my cupcakes. Does anyone else get really excited about how great cupcakes look when you put a little piping effort into it? Yes, awesome. So the results are shown above. I urge you to experiment and trying drawing different things! If you are new to piping, you can pick up basic piping tools at Bulk Barn. You’ll need a piping bag and a tip. I used a small-ish (not the smallest) round tip. While you’re at Bulk Barn pick up a few piping tips… they are SO much fun. If you get more than one tip you’ll want a ‘coupler’, this allows for easy tip-change. Ok, here’s pictures to make everything I said make sense…

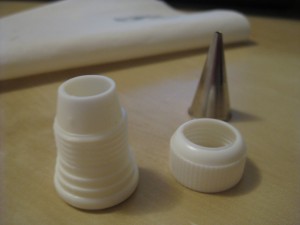
Here’s your piping bag, piping tip, coupler, and coupler ring.
IMG_3873Here’s a close-up of the coupler pieces so you know what to look for:
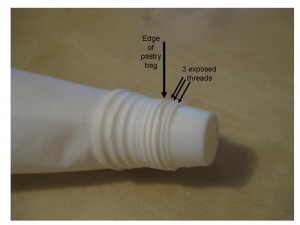
IMG_3874Now, you’re going to want to insert the large part of the coupler into the pastry bag. You will likely have to cut the tip of your pastry bag as you want the bag to just come over 2-3 threads of the coupler.
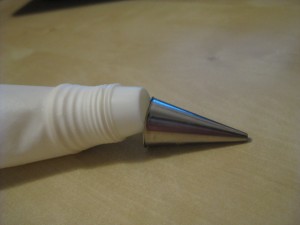
pasrty bagNow the tip fits into the end of the coupler.
IMG_3878…and the coupler ring screws on!

IMG_3879Now, this is handy because you can now take the tip off of the pastry bag without having to empty the bag and flip the whole thing inside out. All of this stuff is VERY cheap. you could get 2 couplers, 2 pastry bags and 2 piping tips for about $10. When I made these puppies I had 2 bags going (white & chocolate) and so when I switched colours I just had to take the tip off, clean it out and screw it on to the other bag.

Posted in baking | Tagged , , , | Leave a comment

Erica's Kitchen – 2

I have not cooked or baked in more than two weeks. What I have done is travel to Rome and back. Pretty fair deal I’d say.

While I was in Rome I ate so much tasty food and made a bit of a photo diary of everything. Here we go folks… my food adventures across the pond…

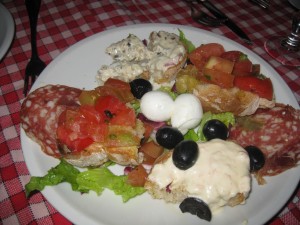
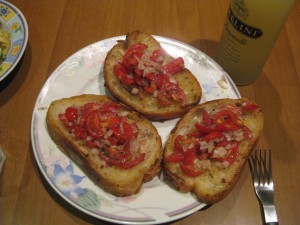
First night in we went out in Trastevere, area which Andrea & Steph live in. It is famous for all of the restaurants and bars. I figured since it was my first night I’d go traditional. We had bruschetta… which apparently means ‘plate of goodness’ and not just ‘tomatoes on toast’… I even ate the mushroom tapenade. Booya.

IMG_3221

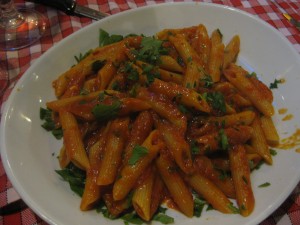
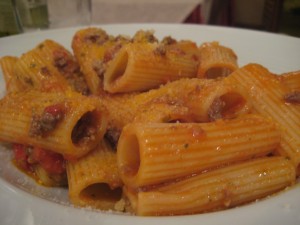
For main I had a favourite, Penne Arribiatta… or penne with spicy pepper sauce. It’s simple but the taste was powerful. My mouth is watering.

IMG_3222

I did a lot of different things while I was in Rome… what I am most proud of is eating gelato… every single day.

IMG_1398

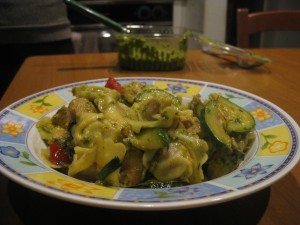
As I was staying in Andrea’s apartment, I had access to a kitchen. It was nice as we could save a bit of money. The second night we stayed in and Andrea whipped up a nice tortellini dish and some (obviously) bruschetta. It’s so easy to cook there and get good results, all of the cheese and pasta is fresh.

IMG_3326IMG_3328

I went to the Vatican on the 3rd day and had a little sit-down for some pizza and reading. (I ate a lot of pizza… its so hard to say no to…)

IMG_3390

GREATEST COOKIES EVER! From a bakery down the street from Andrea’s place… I am so envious of the woman that runs it. She had a massive oven with cookie trays the size of my kitchen table… my dream.

IMG_3499

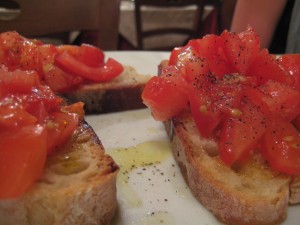
On our last night we went to a wonderful little restaurant near Andrea’s… as it was my last night I had to have more buschetta… I could really live on this stuff.

IMG_1550

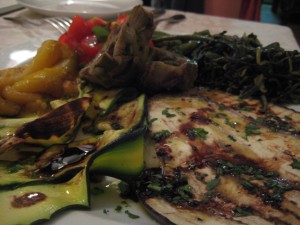
This was a plate of grilled vegetables. I wonder how these people make everything taste so good? Maybe I need to be a bit more liberal with my olive oil? That or quit trying and just move to Italy.

IMG_1552

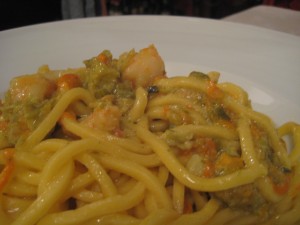
For my main I had… some sort of pasta. Haha, we all had pasta and we were all sharing. The noodles taste like they are made of butter and everything was just perfect.

IMG_1558IMG_1554IMG_1555

I obviously ended the night with gelato…

IMG_3612Awesomely super trip! All trip picturesare on my facebook page. I hope to return to Italy and see more than Rome… maybe do some sort of food & wine tour? Oh I can keep dreaming…
Posted in Update | 1 Comment

Carrot Cake

The other day I had some free time so I turned to my trusty Google Reader to see what my fellow bloggers were baking. I came across My Baking Addiction who had just finished making a fabulous 3-layer carrot cake. Conveniently I had the same cookbook (Baking: From my home to yours by Dorie Greenspan) that she had been browsing so I set to it.

Cake Ingredients:

  • 2 cups all purpose flour
  • 2 teaspoons baking powder
  • 2 teaspoons baking soda
  • 2 teaspoons ground cinnamon
  • ¾ teaspoon salt
  • 3 cups grated carrots
  • 1 cup coarsely chopped walnuts of pecans (I used pecans)
  • 1 cup shredded coconut (sweetened or un)
  • ½ cup raisins or dried cranberries (I used cranberries)
  • 2 cups sugar
  • 1 cup canola oil
  • 4 large eggs

Preheat oven to 325F and set racks to bottom and top thirds. Butter and flour three 9×2” round cake pans.

Whisk together the flour, baking powder, baking soda, ground cinnamon, and salt. Set aside.

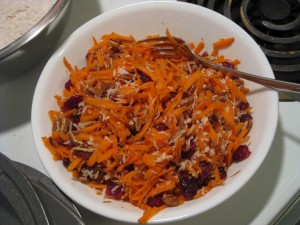
In another bowl, combine carrots, cranberries, and pecans.

IMG_3007

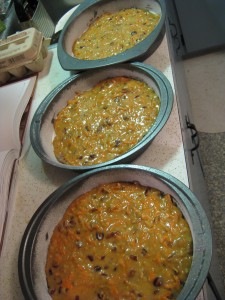
With a stand mixer fitting with the paddle attachment, (or with a hand mixer in a large bowl) combine sugar and oil together. Add eggs one by one. Beat until batter is smooth. With the mixer on low, add the flour mixture just until combined. Fold in carrot mixture. Divide batter evenly between the 3 pans.

IMG_3009

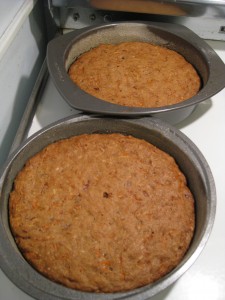
Set 2 pans on the bottom rack and one on the top. Bake for 40-50 minutes, rotating pans halfway. The cake should be pulling away from the sides and produce a clean toothpick from the centre. Set cakes to cool.

IMG_3012

Frosting Ingredients:

  • 8 oz cream cheese (one block) at room temperature
  • ½ cup butter, at room temperature
  • 3 ¾ cup icing sugar
  • 1 tablespoon fresh lemon juice
  • ½ cup shredded coconut (optional)

With the paddle attachment on your stand mixer… or a spoon and a powerful wrist… beat the heck out of the cream cheese and butter. Gradually add the sugar and eventually the lemon juice. Beat until smooth and lovely. Stir in coconut if you fancy it.

ASSEMBLY!

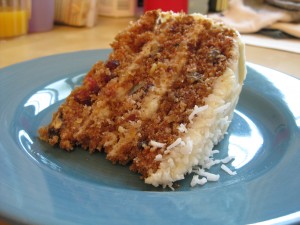
Flip your cakes out of their pans. Start with one layer, upside down on a plate. ICE IT! Add the next layer, right side up. ICE IT! And finally, the last layer, also right side up. ICE IT ALL!! Top with some coconut and toasted pecans. You can eat it from the fridge or at room temperature… the icing is better at room temperature.

IMG_3020

Lastly, phone all your friends and invite them over for cake. OR take pity on your friends and bring it to them.

Posted in baking | Tagged , , , | 1 Comment

Homemade French Fries

I could lie to you and say my favourite foods are crème brule, baked goat cheese, and boeuf bourguignon… but that wouldn’t be very nice of me. Instead, I will put my cooking cred on the line and tell you… my favourite food is… French fries. I am a self proclaimed French fry connoisseur. In my opinion, Waterloo’s best restaurant fries are at Molly Bloom’s and best quick fries will always be at McDonald’s1. If you want French fries at home but without the work, M&M Meats sells great shoe-string fries and they cook in 6 minutes. Orrr… you can make these. It would only make sense that I attempt to make my own. I have perfected them over the years and this is the result.

Ingredients:

  • 6 medium sized red potatoes, rinsed2
  • Cooking spray3
  • 1/3 cup vegetable oil
  • 1 tsp black pepper
  • ½ tsp chili flakes
  • 1 tsp paprika4

Total prep time: 15 minutes

Total cook time: up to 1 hour

Turn oven to 450F

Pull out a cookie sheet and give it a generous spray with the cooking spray. Slice your potatoes into your desired fry shape. Personally, I like shoe-string style but you can cut them into steak fries if you’d like. Once your potatoes are chopped, toss them on the cookie sheet. Pour the oil over the potatoes and toss with your hands. Spread the potatoes out into a single layer.

Wash your hands.

Sprinkle pepper, chili flakes, and paprika over the fries. Toss the tray in the oven.

After 5 minutes, pull the tray out and toss the fries with a spatula. Return to oven.

Repeat this after 20 minutes and 30 minutes. Depending on how many fries you’re making, they should be done in 45 minutes to 1 hour.

Serve immediately.

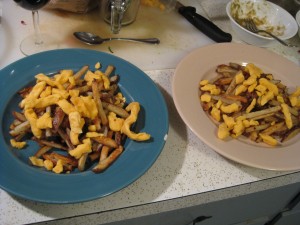
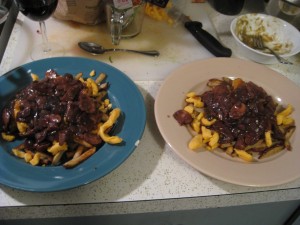
A few weeks ago a vegetarian friend of mine mentioned that he missed eating poutine, which has beef stock in the gravy. I got a bit ambitious and offered to make vegetarian poutine. I made mushroom gravy, this one, and my homemade fries. It was fun to make, though there were a lot of mushrooms which I still cannot bring myself to embrace, please withhold judgment.

Poutine Pictures!

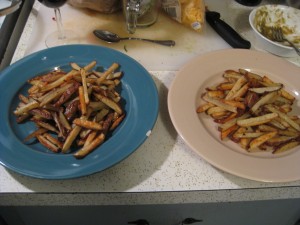
Fries!

IMG_3024Cheese curds!

IMG_3025GRAVY!!

IMG_3027

Notes:

  1. Completely unrelated to cooking… when I was growing up my mom and brother really liked Big Macs, I mostly ate French fries though. When I came to university I essentially stopped eating McDonald’s as there was no real excuse to go. UNTIL… this summer… I was out with my brother and we needed food… apparently Ben never stopped going to McDonald’s so he suggested we go there. I figured, it had been at least 4 years, what harm can it be? That was 3 months ago. I have been SIX more times. Curse you brother and your manipulative ways and curse you McDonald’s and your unreal French fries. I want those puppies at my wedding
  2. Really, you can make as many fries as you want so long as it’s a single layer on the sheet. I just needed a number for the ingredient list.
  3. TRUST ME, you need cooking spray AND oil. Otherwise you will have a very hard-to-clean pan and mushy fries that you’ve had to scrape off.
  4. Again, just my choice of spices, you can stick to plain salt if that’s your thing.
Posted in snacks | Tagged | Leave a comment

Chili

I came across this recipe last fall when I was hosting a Mexican fiesta. It’s very simple and has a classic taste. My favourite part is the fact that not only can you make it the night before but it is recommended that you do so! It freezes really well. I like to freeze it in single servings, heat it up and eat it with a piece of toast for lunch. You can easily change up the vegetables if you want. I add frozen corn kernels if I have them on hand. You can also change up the peppers if you’d like, add green, yellow, orange, etc. Sure, the recipe starts with a pound of bacon but the taste is awesome and this puppy makes almost 8 servings so you’re really not eating THAT much bacon… gosh I love bacon…

It’s not especially spicy so if you want an extra kick add some cayenne, red pepper flakes, or whatever you’d like. This recipe is very flexible. Thank you to my friend and yours, the Nova Scotia giant, Michael Smith.

Ingredients:

  • 1 lb bacon, chopped
  • 2 Spanish onions, finely chopped (3-4 cups)
  • 1 head garlic, peeled and sliced1
  • 2 red peppers, chopped
  • 2 lbs ground beef
  • 4 heaping tablespoons chili powder
  • 2 x 28oz cans diced tomato
  • 1 x 19oz can black beans
  • 1 x 19oz can kidney beans
  • Salt & Pepper

Total prep time: 40 mins prep, 1 hour simmer

Feeds a crowd

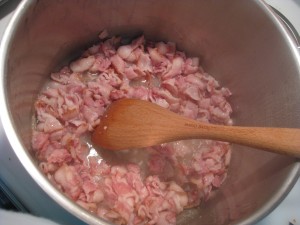
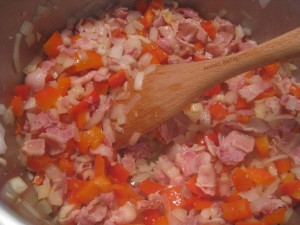
Heat a large pot over medium-high heat and add bacon. Add a couple of tablespoons of water to get it sizzling.

Mmm…bacon…

IMG_2978

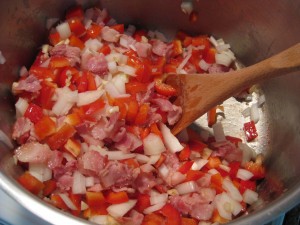
Once the bacon is cooked, but not crispy, pour off the excess fat2. Add onions, garlic, and red pepper.

IMG_2980

Cook until everything is soft and aromatic.

IMG_2981 Add the chili powder and the ground beef.
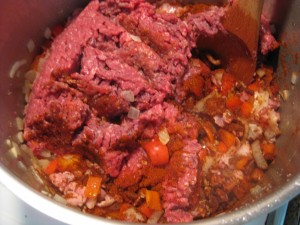
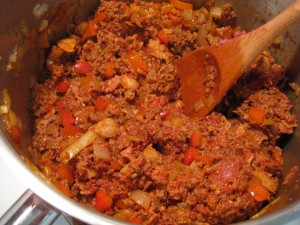
IMG_2983

Give it a really good stir to get all the vegetables coated in the chili powder and to break up the beef. Let that cook for about 5 minutes, tossing with a large wooden spoon.

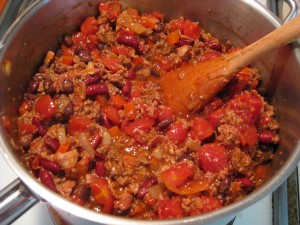
IMG_2984 Drain and rinse the beans3 (can be done in a colander). Add tomatoes and beans to the pot and season with salt and pepper. Normally I don’t add a lot of salt to anything that I cook as:
a)      We all eat too much salt anyway, and;

b)      There is usually another ingredient in the recipe that is full of salt (example: chicken broth).

In this case, there isn’t much salt other than the chili powder so add about 2 teaspoons. I always go crazy with fresh black pepper but 2 teaspoons is a good estimate.

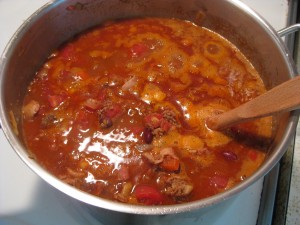
Stir all the goodness together and turn heat to medium low. Allow to simmer for 1 hour, stirring every 10-15 minutes.

This is the chili just after everything has been added and stirred together.

IMG_2986Here it is simmering away nicely.

IMG_2989Silly me I didn’t take a picture of the finished product! It’s chili… it will look red and tasty… and full of beans…

Something I’ve done is made the whole thing the day before and then put the whole pot in the fridge (once it’s cooled). This way, when I want to serve I can take it out and put it right on the stove. Being it up to a simmer gradually, stirring regularly so the bottom doesn’t burn.

Notes:

  1. Yes, a whole HEAD of garlic. Trust me.
  2. If you’re really into saving calories, pour off the bacon fat and then spoon the bacon onto paper towel to get rid of as much as possible. I don’t quite go to this measure as bacon fat is the secret ingredient to make every dish that’s ever existed taste that much better. Sure, I might as well just rub it all over my thighs but it’s not like I eat this way everyday… maybe…
  3. According to my secret source, you should always drain and rinse beans. Something about the fact that while in the can they release gasses and that should be rinsed off… just drain and rinse them. Frankly, I chose to drain the beans because bean juice is one of the nastiest substances that has made an appearance in my kitchen. (Ok, parmesan cheese smells like vomit when you cook it but the taste overrules the smell) My point… drain and rinse your beans and eat parmesan cheese at every opportunity. Wow, that was gross.

Boomer is always a great help. Here he is providing me with all the encouragement I could ever need. He’s looking at me and thinking “Hey woman, are you done yet so I can come slurp up anything you dropped on the floor? Gee you make life so tough for me.”

IMG_2990

Posted in dinner | Tagged , , , , | 2 Comments