Chocolate Cake

Anyone can make this cake. Just about anyone can make it well; the exception being my brother. Sorry, Ben, I make ‘mom’s chocolate cake’ better than you do. Given that it’s the only thing I do better, let me have this.

Anytime I’ve had a friend ask me for a classic birthday cake recipe, this one… takes the cake, har… har. I couldn’t resist. It’s the standard, moist, fluffy, chocolaty cake that won’t disappoint. It’s easy and you can make it as a double layer, triple layer, cupcakes, or a bundt. I like to make it in a bundt pan because, well, I’m lazy and it means I only have one pan to wash. The preparation is the same for each size; it’s just the cooking time that varies. Read right to the bottom for individual instructions. Also, a simple chocolate icing recipe is included at the bottom. I have no idea who to give credit to for this recipe as I have seen similar recipes on cocoa containers, different websites, my mom, and other family members so… it belongs to no one! Here we go…

Ingredients:

  • 2 cups white sugar
  • 1 ¾ cup all-purpose flour
  • ¾ cup cocoa powder
  • 1 ½ teaspoon baking powder
  • 1 ½ teaspoon baking soda
  • 1 teaspoon salt
  • 2 eggs
  • 1 cup milk
  • ½ cup vegetable oil
  • 2 teaspoons vanilla extract
  • 1 cup boiling water1

Total prep time: 20 minutes

Total cook time: varies 20 minutes – 1 hour

Method:

Preheat oven to 350F.

In a large bowl mix together the sugar, flour, cocoa powder, baking soda, baking powder, and salt.

In another bowl mix together the eggs, milk, and vegetable oil. Add to dry mixture and stir until fully incorporated. Add vanilla and stir until everything is combined.

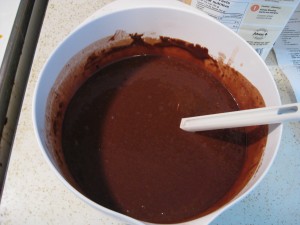
Once everything is nicely together add the boiling water. Stir very slowly as it gets a bit sloppy but you are still aiming for full incorporation. As you do this you will undoubtedly be thinking ‘my this is thin!’ and well, you’re right. It’s going to be VERY thin. Thinner than anything you’ve baked before. It’s going to be like chocolate soup, (mmm chocolate soup…).

Scroll down for baking instructions.

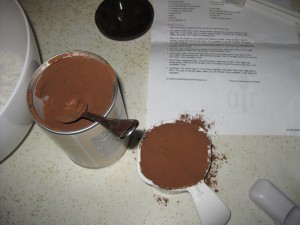
Does anyone else have the problem where they are unable to measure cocoa without making a mess? It has never been done.
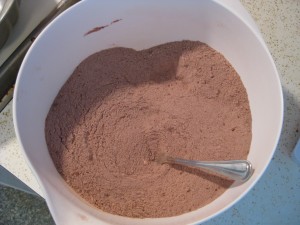
IMG_2797Here’s the dry ingredients mixed together. I use a fork to sift it and gets out most lumps.
IMG_2799

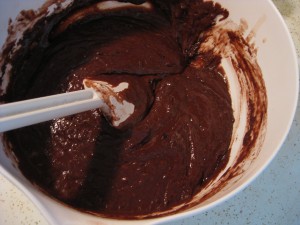
Here it is all mixed together, before the boiling water is added.
IMG_2802

Look who came to help.

IMG_2803

Everything mixed together with the boiling water looking like soup:
IMG_2804

Baking Instructions

Here come the individual instructions. Note that in all instances, a toothpick inserted in the middle should come out clean if it’s done and always allow to cool completely before frosting (recipe to follow).

  1. Two-layer cake: Grease and flour two 9” round cake pans. Divide batter evenly and bake together for 30-35 minutes.
  2. One-layer rectangle cake: Grease and flour a 9x13x2” cake pan, bake for 35-40 minutes.
  3. Three-layer cake: Grease and flour three 8” round cake pans. Divide batter evenly and bake together for 30-35 minutes, rotating half-way.
  4. Bundt cake: Grease and flour a 10 cup bundt pan. Bake for 50-55 minutes.
  5. Cupcakes (makes 24): Line standard cupcake pan with liners, fill each 2/3 full with batter. Bake 22-25 minutes, rotating half-way.

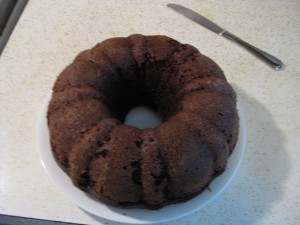
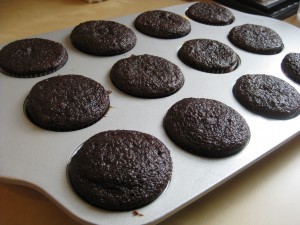
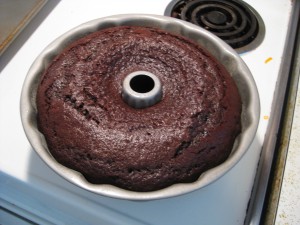
Here are some pictures of the bundt pan cake and the cupcakes.

Bundt cake – finito!
IMG_2810

Bundt cake, out of pan! Mmm…

IMG_2811Cupcakes – done!

IMG_2615

Let’s make some icing! I posted a recipe for “Swiss Meringue Chocolate Buttercream Icing” on my old blog, you can find it here. If you’re looking for something more traditional, give this a try:

  • ½ cup butter
  • 2/3 cup cocoa powder
  • 3 cups icing sugar
  • 1/3 cup milk
  • 1 teaspoon vanilla

Melt butter. Stir in cocoa. Alternate adding sugar and milk, beating consistently. Add additional milk if it’s looking too thick. Stir in vanilla. If you don’t use it right away, put it in the fridge. When you’re ready to ice your cake/cupcakes, put the icing in the microwave for 10 seconds at a time until it’s easier to spread.

Notes:

  1. Want to get creative? Instead of using 1 cup of boiling water, try 1 cup of brewed coffe. Emphasis on brewed. My mom once told me that when she first made this cake she put in in 1 cup of coffee grounds… grity, gross, coffee grounds. No, no. Brewed coffee. I don’t have a coffee maker so I just stirred a teaspoon of instant coffee into the boiling water.
Posted in baking | Tagged , , | 3 Comments

Erica's Kitchen – 1

Given the title of my website, I thought it fitting to share some pictures and thoughts on my “workspace”… AKA my kitchen. Now, I wouldn’t lie to you nice people, I do in fact have a messy kitchen. Here is some proof. Please note that all of these pictures were taken on the same day… please note that all of this pictures were taken in one afternoon afternoon in about a 2 hour period. At this point I’m surprised my counters haven’t worn thin from being wiped and my fridge door and garbage can hinges aren’t dissolving. Here we go…

Exhibit A: Kitchen after making simple chocolate icing… with a dash of last night’s dinner.

Slide1

Exhibit B: I decide to clean… mostly because I have to make a cake and need a lot of the dishes that I dirtied making icing.

Slide2

You’ll notice that it can look pretty good! Despite the sky-blue ply-wood cupboards, the perma-stained counter, the ancient oven… and my general hatred for doing dishes, my kitchen isn’t so bad. That is until… I decided to use it for the second time that day.

Exhibit C: I make a cake and I’m back at square one.

Slide3And so is the story of my messy kitchen. On any given day I might use my kitchen on 3 separate occasions. As I’m home all day, I tend to cook three meals a day. If I cleaned my kitchen after every use I would never leave. I tend to clean everything at the end of the day OR if I need a ‘coffee break’ I’ll do some dishes. Let it be known: I don’t have a dishwasher. I have a sneaking feeling that the man I marry might not mind doing dishes… after all, it’s the age-old trade off: I cook, you clean. Someday…
Next installment: kitchen gadgets and my choice cooking tools!

Posted in Update | Leave a comment

Guacamole

Ok people, here it is. This recipe is the reason I have friends. I have changed people’s opinions of avocados with this puppy. If you have a friend that is afraid of avocados or hesitant to try them, serve this up and they’ll be sold after the first bite. It comes to us from the lovely Barefoot Contessa.

Ingredients:

  • 4 haas avocados1
  • 3 tbsp lemon juice
  • 8 dashes hot pepper sauce (I use Tobasco)
  • ½ cup red onion, finely diced
  • 1 large clove garlic, minced
  • 1 tsp salt
  • 1 tsp black pepper
  • 1 medium tomato

Total prep time: 20 mins

Serve immediately if you can, this does not last very long in the fridge.

Scoop out the avocado. This is a bit tricky but once you get the hang of it, you’ll look forward to it. Here’s a helpful video: http://www.youtube.com/watch?v=BxQwLpIqIPs

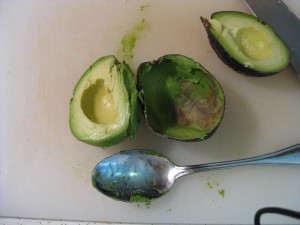
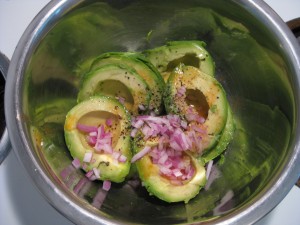
The jist of it is… cut the avocado in half from tip to tip but cut around the pit inside. Now, twist the two halves apart and you’ll see the pit will stick to one half. Thwack the pit with a knife so the blade gets wedged into it. Twist the knife so the pit comes out but is still stuck to the knife. With a paper-towel, pull the pit off the knife blade. Now you have 2 avocado halves. Grab a spoon and scoop out the innards into a large bowl. It is ok to have large chunks, they will be dealt with later. Immediately add lemon juice, hot sauce, onion, garlic, salt, and pepper.

Here is what my one-scoop avocado half looks like:

IMG_2768Here’s what it looks like with everything in the bowl!
IMG_2771

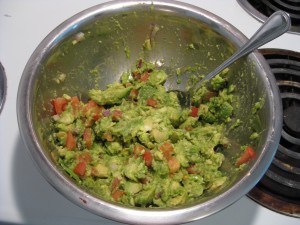
With one hand on the edge of the bowl and the other holding the knife, run the knife through the mixture and gradually turn the bowl as you do this. Basically you don’t want to mush the avocado too much but you want it in little bits so you can scoop. I much prefer it chucky like this.

Now, slice tomatoes in half and remove the seeds. These tend to just be gooey and no one likes them anyway. Small-dice the tomatoes; add to the bowl and toss with a spoon. Serve immediately2 with tortilla chips (I like the multi-grain ones).

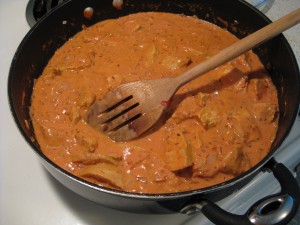
Here she is!

IMG_2772I like to serve it with multi-grain Tostitos!
Notes:

  1. Haas avocados are the dark green, ugly ones. They turn very dark, almost black, when they are ripe. You want them at this state. They should be tender but not too squishy to the touch. If they are still quite green and firm, bring them home and put them in a bowl next to bananas to speed up the ripening process.
  2. Ok, so you CAN put this stuff in the fridge but not for too long. It will really only last for a couple of hours. The avocado turns brown and gets slimy pretty quickly.
Posted in snacks | Tagged , | 2 Comments

Butter Chicken

This recipe is easily in my top 5 favourites. If I could ask you to make one of my recipes, this would be it. Last winter my brother invited myself and our cousins for dinner and made this for us. I was sold after the first bite. My brother and I have both made it numerous times all to rave reviews. My old roommate, Dave, wanted to surprise his girlfriend last valentine’s day. He was scheduled to fly in the weekend after valentine’s day but changed his flight to the 14th without telling her. The plan was to get in early, get to her house, get dinner ready and have her walk in the door after work to have him and this great dinner waiting. Hello CUTE. One problem… Dave doesn’t especially cook. All of my bitching and nagging as his roommate seemed to disappear when I helped him plan the menu and then teach him how to cook everything. The week before he was to leave, we tried out this Butter Chicken. The night before Dave flew out, I measured out all the spices so that when he got there he would be prepared… that and no one wants to buy 8 different spices for one meal. Dave made it to Saskatoon and wooed his girlfriend. The chicken turned out which tells you… if Dave can make it, so can you. This recipe comes to us from the saucy Trish Magwood.

Ingredients:

  • 1 cup plain yogurt (I like Balkan style)
  • ¼ cup lemon juice
  • 2 tsp ground cumin
  • 2 tsp ground coriander
  • 2 tsp cayenne pepper1
  • 1 tsp garam masala
  • ½ tsp ground tumeric
  • 2 tbsp minced fresh garlic
  • 1 tbsp minced fresh ginger
  • 2 tsp salt
  • 3 lbs boneless, skinless, chicken (I use breasts but you can use thighs or a combo)
  • 3 tbsp butter
  • 1 medium onion, small diced
  • 4 tsp cumin seeds (SEEDS, not ground)
  • 1 chili, minced (I use whatever small chilis are at the grocery store, jalapeno works)
  • 2 cloves garlic, minced
  • 1 cup crushed tomato
  • 1 cup heavy cream (whipping cream 35%)
  • Fresh coriander, chopped
  1. Total prep time: 15 minutes night before, 1 hour night-of
  2. Feeds 4

The night before or at least 4 hours before dinner… prepare the marinade. Add the yogurt, lemon juice, cumin, coriander, cayenne, garam masala, tumeric, garlic, ginger, and salt to a bowl. Mix er’ up! Add chicken to a large Ziploc bag and pour in marinade. Seal bag and slosh the chicken around inside to coat thoroughly. Put bag in the fridge. I like to put the bag in a dish just in case it decides to leak.

1 hour before dinner… preheat oven to 400F. Remove chicken from fridge and pour the whole bag into a lasagna dish. Spread the chicken out into one layer. Bake for 25-30 minutes or until juices run clear.

While the chicken is cooking… in a large sauté pan, heat butter over medium-high heat. Add onions and cook until translucent, about 5 minutes. Add garlic, cumin seeds, and minced pepper, cook an additional 5 minutes. Lower heat to medium-low and add tomato puree and salt. Add cream and continue to simmer for 2-3 minutes.

Once chicken is ready… pull chicken pieces out onto a large cutting board. Cut chicken into bite sized pieces. Toss all pieces into sauté pan with the simmering sauce. Allow to simmer for 20-25 minutes on medium-low. In the meantime make some rice, I like to make jasmine rice with this dish. If you go to the rice aisle at the grocery store you will see it, it’s pretty common. If you don’t have it, regular old Uncle Ben will do the trick just as well. Look at the beautiful orange colour…

IMG_2524

That’s it! That wasn’t so bad, eh? I’ll admit, this recipe is a bit intimidating with all the spices and it does require a bit of labour. It is SO worth it. We haven’t even gotten to the best part… this is a pretty large recipe and will feed 4 comfortably… or it will feed 1 for 4 meals… this meal is to-die-for as left-overs. I will bring it as lunch and eat it with my fingers, you don’t even have to heat it up. Ok, now I want to make this…

Notes:

  1. Cayenne pepper… do not be afraid! If you are VERY opposed to spicy food you can omit this AND the chili pepper that goes in the sauce later. Honestly though, it’s really not that spicy. Maybe try it with a bit of cayenne and no chili pepper, you’ll survive, I promise.

UPDATE!! My favourite brother, who also loves this recipe, has provided me with lower-fat instructions… see below:

This is a recipe I tweaked in the week after I’d broken up with a girlfriend. I wanted some comfort (which is generally fatty and delicious) but realized after one trip to the gym that I’d put on considerable “relationship weight” which I obviously needed to lose if I had a hope of finding another gf.

Butter Chicken was my salvation. A variation of Trish Magwood’s recipe is one of my go-to dishes mostly because of the delish left-overs! I decided to take a crack at making a slightly less obesity-inducing version while maintaining all (ok, the majority) of the flavour.

-Prepare marinade as directed (substitute lower fat Yogurt if you’re desperate to save calories…I didn’t)

-Marinate chicken overnight. 2 hours of love is never enough. 24 hours is just enough time for that chicken to get happy

-Bake as directed, until juices run clear (and not longer, nobody likes dry chicken)

Once the chicken is done in the oven (it’s important you wait), remove from pan and reserve ½ cup cooking juices (don’t waste flavour!!)

-substitute olive oil for butter/ghee in the sauce.

-follow recipe on onions/garlic etc. until you get to the “add tomato puree” part

When you add the tomato puree, add 1 cup each chopped broccoli and cauliflower (bite sized pieces, the bigger they are, longer they take to cook), ½ cup carrot (sliced on the bias)

-add ½ cup reserved cooking liquid

-substitute 10% cream for the 35% cream

Cover and let simmer for 15 minutes to allow vegetables to cook

Remove lid and continue to simmer until sauce thickens. The longer you let it simmer, the more intense the more delish it will be. Be sure to stir every few minutes to avoid burning.

Serve on Basmati or Jasmin rice.

Posted in dinner | Tagged , , , | 1 Comment

First Date Salad

There is no more appropriate title for this recipe. I have made it on so many dates, particularly first dates. It’s always a hit with the sweet dressing, fresh strawberries, and crunchy pecans. It’s dead simple and you should make it tonight. Recipe credit goes to… me! You can thank all the too-sweet, and too-milky trials that got me to this result, enjoy!

Ingredients:

  • 1 tub of spinach
  • 1 pint of strawberries
  • ½ cup pecans
  • 4 tbsp Mayo or equivalent (miracle whip etc)
  • 2 tbsp Milk
  • 2 tbsp White sugar
  • 1 tbsp White vinegar
  • ½ tbsp Poppy seeds
  1. Total prep time: 15 mins
  2. Feeds 4 with dinner or 1 as dinner (haha I love salad)

Preheat oven to 350F. Pour pecans onto a baking sheet. Toast pecans for 6 minutes. If you think this step sounds a bit silly and useless… taste a pecan before you toast it and then after you toast it. You will not regret it. Toasting the pecans gives them a lighter crunch rather than the staler crunch which they have pre-toast. Pecans are also a bit bitter; toasting them eliminates this. Trust me. Toast them.

For the dressing, measure out mayo, milk, sugar, vinegar, and poppy seeds in a small plastic container. Put the lid on and give it a good shake. That’s it. Note that I only make enough dressing for one salad. Because of the milk, this dressing doesn’t last very long. I’m sure it might last a few days but I’d rather not chance it. Besides, it’s so simple you can just keep making it. This dressing is very similar to the Kraft ‘Creamy Poppy Seed Dressing’… but YOU’RE going to make it, talk about impressing the ladies. Seriously though, if a guy A) served me a salad with dinner and B) made the dressing himself… *swoon*.

Wash the strawberries and cut into bite sized pieces. When you’re ready to eat, add the spinach, strawberries, and pecans to a large bowl. Toss with dressing. Serve immediately. If you put the salad together too early it will get soggy. No one likes soggy salad and I assure you, you CAN make friends with salad.

Posted in salad | Tagged , , | Leave a comment

Beefy Cheesy Manicotti

The title rhymes! You have to try it!

Do not fear the strange Italian pasta! This recipe does require a bit of prep but its well worth it. The ingredients are similar to lasagna but assembled a bit differently. This recipe comes from the lovely Giada Di Laurentiis with a bit of my own instructions.

Ingredients:

  • Olive oil
  • 1 medium onion (size of a softball) chopped
  • 1 pound ground beef1
  • Salt & pepper2
  • 1 box (about 14 pieces) manicotti noodles (found in the pasta aisle, they look like jumbo penne noodles)
  • 1 container ricotta cheese (400g or about 1.5 cups)
  • 3 cups grated mozzarella cheese
  • 1 cup grated parmesan cheese
  • 2 tablespoons chopped parsley
  • 2 cloves garlic, minced
  • 4 cups marinara sauce3
  1. Total prep time: 45 mins
  2. Total cook time: 35 mins
  3. Feeds 4, probably with left-overs

In a large frying pan, heat 1 teaspoon olive oil, onion, and meat over medium heat. Season with salt and pepper. Cook until meat is no longer pink and onion is translucent. As this is cooking, break up the meat. Remove from heat and allow to cool.

Line a baking sheet with waxed paper. Bring a large pot of water to a rapid boil. Add 1 teaspoon salt. Add manicotti in batches of 4 (depending on the size of your pot you can add more or less noodles, don’t crowd the pot). Cook manicotti according to directions – about 7 minutes. When noodles are done, place them on the lined baking sheet and continue with the next batch.

Meanwhile, in a large bowl, combine ricotta, 1 ½ cups mozzarella, ½ cup parmesan, parsley, garlic, salt and pepper. Stir in cooled meat and onion mixture.

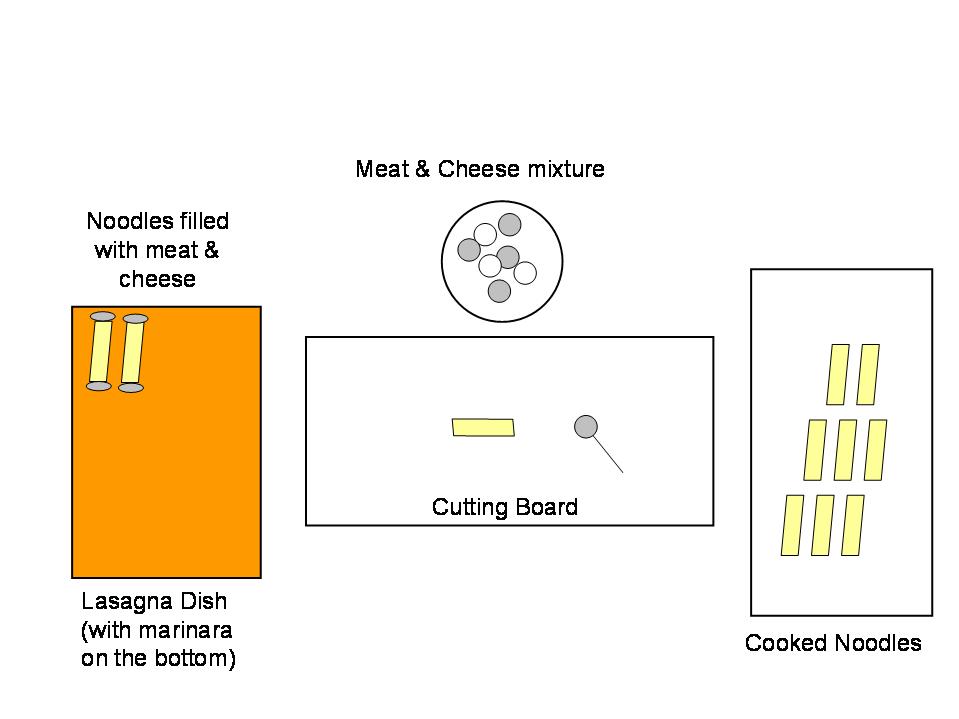
Spray a 9”x13” baking dish (lasagna dish) with cooking spray. Spread 2 cups of marinara sauce over the bottom of the pan. Now comes the tricky part… stuffing the noodles. I like to set up my workspace as shown below:

manicotti

So the meat and cheese mixture needs to make it’s way into the noodles and the set into the lasagna dish on top of the marinara sauce. Stuffing the noodles is no delicate task. I’ll be honest, I use my fingers. I have tried using a spoon, I have tried making an injection bag out of a clipped Ziploc bag… my fingers work best. If you come up with a new tactic please share it! So stuff all your noodles, be generous. I have made this a few times and the meat & cheese mixture will stuff all the noodles pretty nicely so don’t be cheap. Line your stuffed noodles in the lasagna dish in a single layer, don’t stack these puppies. Cover the stuffed noodles with the remaining marinara sauce. Top with the remaining mozzarella and parmesan. Bake for 30 to 35 minutes at 350F. Allow to cool slightly before serving.

This dish is great with garlic bread and a nice salad. It is also excellent left-over for lunch the next day.

Notes:

  1. If you’re not into eating beef or you want to change it up, try ground turkey or chicken. Both work just fine.
  2. I swear by fresh ground pepper. You can get a pepper mill for dirt cheap and you can get peppercorns at any grocery store in the spice aisle.  I also enjoy kosher salt instead of table salt. Again, you can kind this with all the rest of the salt at the grocery store. Be careful though, do NOT use kosher salt for baking.
  3. If you’re ambitious you can make your own marinara sauce, which I’ll admit is very tasty and impressive. This would require a LOT of prep so stick with the canned marinara sauce from the grocery store. Choose a simple one (either ‘original’ or ‘herb and garlic’). I don’t recommend choosing one that already has meat in it or has a lot of extra ingredients (mushrooms, vegetable medley). The stuffed noodles are the highlight here, let’s not take away from that.
Posted in dinner | Tagged , , , | 2 Comments

Banana Bread

Some notes on bananas… I hardly ever eat bananas yet I seem to buy them regularly. This is because bananas have a secret… locked deep inside their stringy yellow slippery peel lies a delightful, mushy, surprise. Bananas don’t go bad. It’s true. I wouldn’t lie to you. Go buy bananas. Put them on the counter, be artistic, and tell people it’s a ‘still-life’. Now ignore them for a few days. Let the fruit flies collect, let the peel turn spotty and brown. Once the banana is almost totally covered in brown spots, toss that bitch in the freezer. Unfortunately, this secret means you can’t get all of the following ingredients at the grocery store, you have to do that freezing prep. Regular, fresh bananas won’t do the trick. They just aren’t sweet enough. So get your bananas ripe and frozen (you’ll need about 4) and then read on…

Ingredients:

  • 2 cups White Sugar
  • ½ cups Vegetable Oil
  • 2 whole Eggs
  • 2 ⅔ cups Flour
  • 1 teaspoon Baking Soda
  • 2 teaspoons Baking Powder
  • 1 ½ teaspoon Salt
  • 1 cup Milk
  • 2 cups Mashed, frozen Banana1
  • 1 cup Chocolate Chips
  1. Total prep time: 20 mins
  2. Total cook time: 55 minutes

First things first, take your bananas out of the freezer, get them defrosting ASAP. You can also speed up this process by cutting off the tip and then putting them in the microwave for 30 seconds. The peel should come off pretty easily, you might need some help from a paring knife. Make sure you get rid of all the stringy bits. Put the bananas in a glass measuring cup and mash with a fork. You can make it super smooth or leave it a bit lumpy. I like it lumpy because that translates into the bread and you get surprise banana lumps. Who doesn’t love a banana lump? Once it’s mashed, set aside.

In a large bowl, combine sugar, oil, and eggs.

In a separate bowl, combine flour, baking soda, baking powder, and salt.

Into the large bowl, alternate adding milk and dry ingredients (I go with 3 additions). Mix until just combined, that is the batter is smooth but you haven’t whipped the crap out of it. Over-mixing will make the dough tough and poopy2.

Add bananas and chocolate chips.

Preheat oven to 350F, spray 3 loaf pans (medium, 4.5″x 8.5″) with cooking spray (be generous). Divide dough evenly. Bake all 3 loaves together for 55 minutes, rotating as needed3. Bread is done when a toothpick, inserted in the middle of the loaf, comes out clean, not gooey. Let bread cool in pans for 15 minutes. Run a knife along the edges of the bread, flip the pan over and give it a good smack. Some of the chocolate chips will likely stick so you might need to be a bit aggressive but try to be gentle.

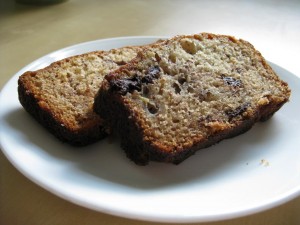
Look!

bananabread

Some suggestions!

This bread is great for breakfast with butter. This bread is also good for dessert with whipped cream and strawberries. This bread is also good any time of the day. Trust me, it’s super. Here’s a little bonus… make the 3 loaves and then FREEZE one, it freezes really well in a Ziploc bag.

Notes:
1. 2 cups bananas = about 4 bananas.

2. The story of ‘poopy’: when I was growing up, my mom made a tonne of chocolate chip cookies. She used the recipe from the back of the chipits package, which she had taped to a recipe card. This recipe called for shortening but my mom always used butter. Scrawled in my dad’s block printing on the bottom of the recipe card: “don’t use shortening, tastes poopy.” Yep, direct quote, my dad.
3. HALF of this recipe makes 12 regular muffins, bake for 20-25 minutes in a sprayed or lined muffin tin.

Posted in baking, breakfast | Tagged , , | 5 Comments

Cream-Cheese & Feta Pinwheels

This recipe comes to us from the lovely and fabulous, Caitie Rosen. Between the two of us, this recipe has made appearances at pot-lucks across the country. It’s simple, quick, and you will have a hard time sharing.

Ingredients

  • 8 ounces, weight Cream Cheese (1 Box)
  • 8 ounces, weight Feta Ceeese (1 Tub)
  • 1/4 cups Green Onion, Diced
  • 1/2 cups Dried Cranberries
  • 5 whole Soft Tortillas (I like to use the spinach ones)
  1. Total prep time: 20 mins
  2. Total fridge time: 2 hrs/overnight
  3. Feeds 5-12 as party appetizer

Soften cream cheese, add to large mixing bowl.

Drain feta, add to bowl.

Add onion and cranberries.

Mix all ingredients together. I find a pasrty cutter works really well to break up the feta.

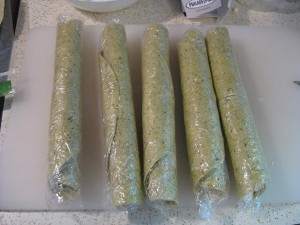
Spread mixture evenly over 5 tortillas (more or less, depending on how thick you spread it). Tightly roll up each tortilla and wrap in cling-film. Refrigerate for 2 hours or overnight.

This is what it should look like at this point:

creamcheesepinwheels_1

When ready, slice roll ups on a angle to form little pinwheels.

If you need to, you can serve these right away but they will stay together better if you put them in the fridge for a bit. Great to put in a cooler and bring to a potluck or a picnic. I also like to use the spinach tortillas but any will work.

Final product:

crreamcheesepinwheels_2

Posted in snacks | Tagged , | 2 Comments

Pizza

Note: While I get things going at mymessykitchen there won’t be a lot of pictures in my posts… those will get updated as I go. Patience young grasshoppers!

Update: Now with pictures!

Ingredients:

  • 1 cup All-purpose flour
  • 1/2 cup Whole wheat flour
  • 1/2 tsp Salt
  • 2 1/4 tsp Quick-rising yeast (or 1 package)
  • 2/3 cup Water
  • 2 tsp Olive oil
  • 2 tsp Liquid honey
  • 1/3 cup Pizza sauce (or more if you like it saucy)
  • Your favourite toppings
  • Cheese
  1. Total prep time: 30 mins
  2. Total cook time: 25 mins
  3. Feeds 2 with leftovers, if you’re feeding 4 make a salad.

Don’t be afraid of yeast! As this is quick-rise, it will only take about 20 minutes to rise which is just enough time to chop up all of your toppings.

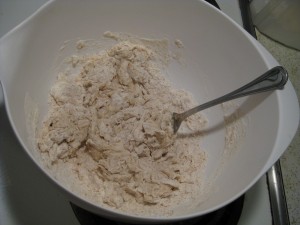
For the dough, in a large bowl combine both flours, salt, and yeast. Measure out water in a glass measuring cup and place in microwave for 1.5 minutes. Once the water is hot, add the oil and the honey. Here’s a tip… measure the oil first, that way the honey will just slide off the measuring spoon. Pour the water mixture into the flour mixture. Lightly mix with a wooden spoon. You’ll see the dough look really sticky and globbing onto the spoon. Like this!

IMG_2776

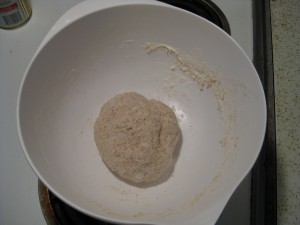
Pull the dough off the spoon and get rid of the spoon. Get your hands into the dough. You are going to knead the dough for about 5 minutes. Kneading is largely done with the butt of your hands. Scoop your hands under the dough and fold it over on itself, then push down and away from yourself with the butt of your hand. Turn the dough slightly every time you fold over. Once the dough is fully kneaded, place bowl in a warm place. May I recommend the top of the fridge, on a windowsill in the sun, on a radiator, OR if none of these exist in your house… place bowl to the side. It should look like this after you’ve kneaded it… it will look the same after it’s risen… it will just be BIGGER!

IMG_2784

Now this is where you get creative… prepare your toppings! Here’s what I usually include:

1 small zucchini, sliced into half moons

1 pepper, any colour… or parts of every colour! Finely diced.

Turkey pepperoni (It’s better for you but tastes just as good!)

Red onion, only a little bit though

Pizza sauce (I like the Primo squeeze bottle sauce)

Cheese, mozzarella, marble, cheddar, and parmesan… whatever you like!

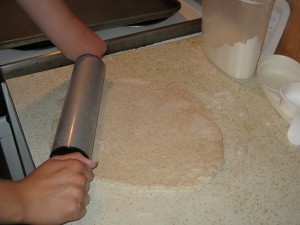
20 minutes have passed… turn your oven to 425F. Clean and dry your counter thoroughly. Grab a pizza pan or cookie sheet, spray with cooking spray (read: rub a bit of oil on it with a paper towel). Take a small palm-full of flour and sprinkle it on the counter. Take the dough out of the bowl and place on counter, roll in flour to coat all sides. Using a rolling-pin (OR a wine bottle… or a can of soup) roll out the dough to the size of your pan.  Note than when you are rolling, it’s a good idea to flip the dough over and re-flour it to prevent it from sticking to the counter. Look!

IMG_2781

Place your dough on the pan. It doesn’t have to exactly fit… my pizza’s are usually oblong weirdo shapes. If the dough hangs over the edge just fold it over on itself. Now top your pizza! Sauce! Toppings! Cheese! Yay!

IMG_2779

Toss that puppy in the oven for 20 minutes. Depending on how thick your toppings are the cooking time will vary. You’re looking for melted and slightly browned cheese and if you put a spatula under the pizza it should be solid and not gooey. Hopefully it will look like this…

IMG_2782

IMG_2783

Feel like BBQing in the last few days of summer? BBQ instructions to come soon from guest-chef/super brother, Ben!

Posted in dinner | Tagged , , | Leave a comment