To get it out of the way I’ll put the recipe at the top and then leave my (witty?) banter for after. This gem comes to us from “Martha Stewart Cupcakes” which is a delightful little book and I recommend everything from it so far.
Ingredients:
- 2 ½ cups cake/pastry flour (not self-rising) sifted
- 2 tablespoons cocoa powder
- 1 teaspoon salt
- 1 ½ cups white sugar
- 1 ½ cups vegetable oil
- 2 large eggs
- ½ teaspoon red gel food colouring1 OR 1 bottle liquid colouring
- 1 teaspoon vanilla extract
- 1 cup buttermilk2
- 1 ½ teaspoon baking soda
- 2 teaspoon distilled white vinegar
Makes 24 standard cupcakes.
Preheat oven to 350F, line muffin tin with liners
Whisk together flour, salt, and cocoa powder, set aside.
With an electric mixer on medium, combine sugar and oil. Add eggs one at a time. Mix in food colouring and vanilla.
Reduce speed to low and alternate adding flour mixture and buttermilk, starting and finishing with flour. Stir well after each addition. In a small bowl, combine baking soda and vinegar (foamy! science!) Add this to the batter, mix on medium for 10 seconds.
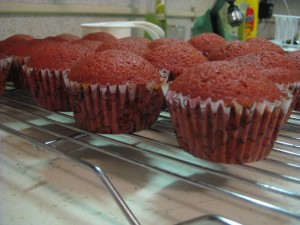
Fill muffin cups ¾ full. Bake for 20 minutes, rotating halfway. If you put 2 trays in at once it may take a few minutes longer. With one tray at a time I was right done at 20 minutes.
Cupcakes can be stored at room temp overnight in a container, in the fridge for 3 days, or 2 months in the freezer.
Notes:
- I recommend gel food colouring. It’s available at Michael’s with the cake decorating supplies. You get a much more vivid colour and it also doesn’t change the consistency of your batter. I bought a box of 8 colours and it lasts a very long time, you only need a little.
- You can make a buttermilk substitution by combining 1 tablespoon of lemon juice or white vinegar with enough regular milk to make 1 cup, let it sit 5-10 minutes and you’re good to go.
I used cream cheese frosting and this INSANE chocolate frosting from this Anna Olsen recipe. If you’re not into piping or decorating or you’re just not feeling like standing in the kitchen for 4 hours, stick with the cream cheese frosting. If you like A LOT of icing, double this recipe. If you’re alright with a modest amount stick with this.
Ingredients:
- ½ cup butter, room temperature
- 6 oz cream cheese, room temperature (3/4 of a philly box)
- 2 cups icing sugar
- ¼ teaspoon vanilla extract
With mixer on medium speed, or a well-toned wrist, combine butter and cream cheese until smooth. Slowly add sugar and then finally vanilla. If you’re not using it right away it will stay in the fridge for 3 days, just bring it to room temperature before using
Ice your cupcakes and Enjoy! I’m already scheming dying the frosting green for Christmas. Really, how cute would that be… red cupcakes with green frosting? It’ll happen.
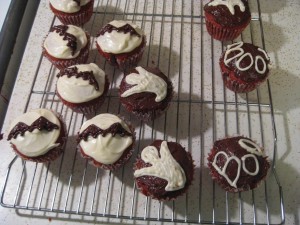
Here’s what mine looked like!
Now here is my banter… I insist on banter because I was in my kitchen for FOUR hours last night. Let me have my banter.
After taking the dog for a long walk after work yesterday I found myself with an entirely free evening. As this occurrence is pretty rare I decided to do something that I knew would a) be worth it, and b) take the whole evening. I made cupcakes and then decorated them for Halloween. I dusted off my Martha Stewart Cupcakes cookbook…. Ok that’s a lie, that book sits next to me on my desk. Anyway, I OPENED my Martha cupcake book and based on a recommendation from the lovely Ms. Rosen I found the recipe for Red Velvet Cupcakes. Feeling a little festive I felt that a dark red cupcake was appropriate. Velvet is a great word to describe these cupcakes as they are very moist and almost delicate tasting and smooth yet they still rise to form nice domes for frosting. Pretty much you are heading for a win-win. It quickly turned into a win-win-win when cream cheese frosting came into the picture.
Sidebar: WHY is it that nearly every icing recipe which accompanies a separate recipe, whether it be a cake, loaf, cupcake, etc, results in nearly twice as much as you need? In the partnering picture it doesn’t LOOK like there is that much more icing than you have put on. Pretty much I have started halving all icing recipes. I have yet to lose. Well, technically I lost this weekend when I made a German chocolate cake and had this killer chocolate icing leftover… but I was a smartie and it went into the freezer and was ready for me to use last night.
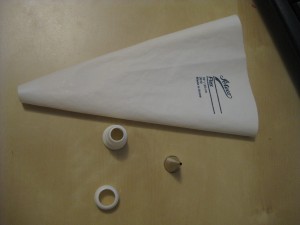
Back to cupcakes… I whipped up the Red Velvet Awesome-cakes and then went to work. With Halloween on the brain I chose to ice half of the cupcakes with cream cheese frosting and the other half with chocolate. I got out my handy piping set and began drawing bats and ghosts on my cupcakes. Does anyone else get really excited about how great cupcakes look when you put a little piping effort into it? Yes, awesome. So the results are shown above. I urge you to experiment and trying drawing different things! If you are new to piping, you can pick up basic piping tools at Bulk Barn. You’ll need a piping bag and a tip. I used a small-ish (not the smallest) round tip. While you’re at Bulk Barn pick up a few piping tips… they are SO much fun. If you get more than one tip you’ll want a ‘coupler’, this allows for easy tip-change. Ok, here’s pictures to make everything I said make sense…
Here’s your piping bag, piping tip, coupler, and coupler ring.
 Here’s a close-up of the coupler pieces so you know what to look for:
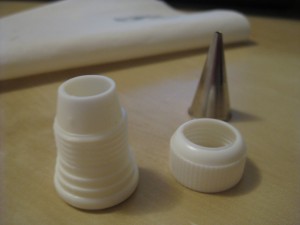 Now, you’re going to want to insert the large part of the coupler into the pastry bag. You will likely have to cut the tip of your pastry bag as you want the bag to just come over 2-3 threads of the coupler.
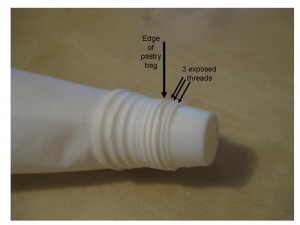 Now the tip fits into the end of the coupler.
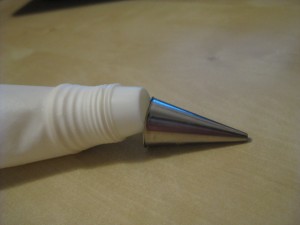 …and the coupler ring screws on!
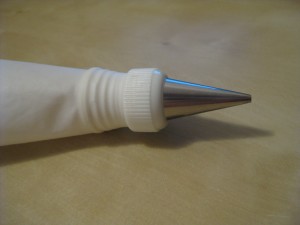 Now, this is handy because you can now take the tip off of the pastry bag without having to empty the bag and flip the whole thing inside out. All of this stuff is VERY cheap. you could get 2 couplers, 2 pastry bags and 2 piping tips for about $10. When I made these puppies I had 2 bags going (white & chocolate) and so when I switched colours I just had to take the tip off, clean it out and screw it on to the other bag.
